Elf Hats Treats
|
Getting your Trinity Audio player ready...
|
Every December, my kitchen transforms into a holiday workshop where magic meets melted chocolate. Last year, my niece Sophie asked if we could make “real elf hats” for Santa’s helpers, and that’s when these adorable Elf Hats Treats were born. My sisters Olivia and Mia couldn’t stop laughing as we assembled dozens of these whimsical confections, but the joy on Sophie’s face made every sticky finger worth it.
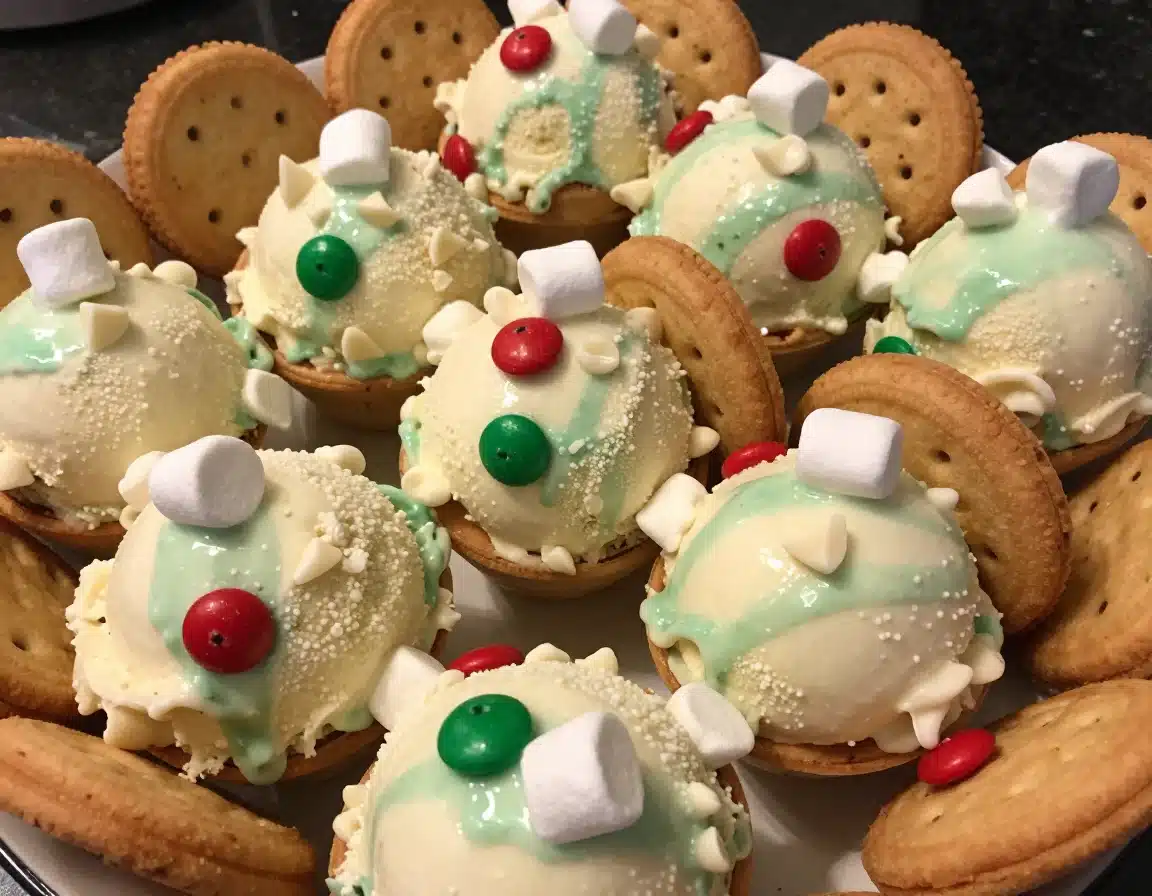
These no-bake Christmas treats combine sugar cones, frosting, and candy to create the most delightful edible elf hats that look almost too cute to eat. Whether you’re hosting a holiday party or looking for a fun baking project with kids, these Elf Hats Treats deliver maximum festivity with minimal effort. They’ve become our signature contribution to school parties and neighborhood cookie exchanges, and I’m thrilled to share this simple recipe with you today.
Why You’ll Love These Elf Hats Treats
These charming Elf Hats Treats check every box for perfect holiday desserts. First, they require absolutely no baking, which means you can make them even when your oven is occupied with the main meal. Additionally, kids adore assembling these treats, making them an ideal family activity during winter break. The ingredient list stays refreshingly short, and you probably have most items in your pantry already.
Furthermore, these Elf Hats Treats are endlessly customizable. You can adjust colors to match your party theme or dietary preferences. They also stay fresh for several days, so you can prepare them ahead of busy holiday gatherings.
The combination of crunchy cone, creamy frosting, and sweet candy creates an irresistible texture experience. Plus, they photograph beautifully for your holiday cards and social media posts.
Most importantly, these treats bring genuine smiles. I’ve watched both children and adults light up when they see these playful confections on dessert tables. They capture the whimsy of the season perfectly.
Ingredients You’ll Need
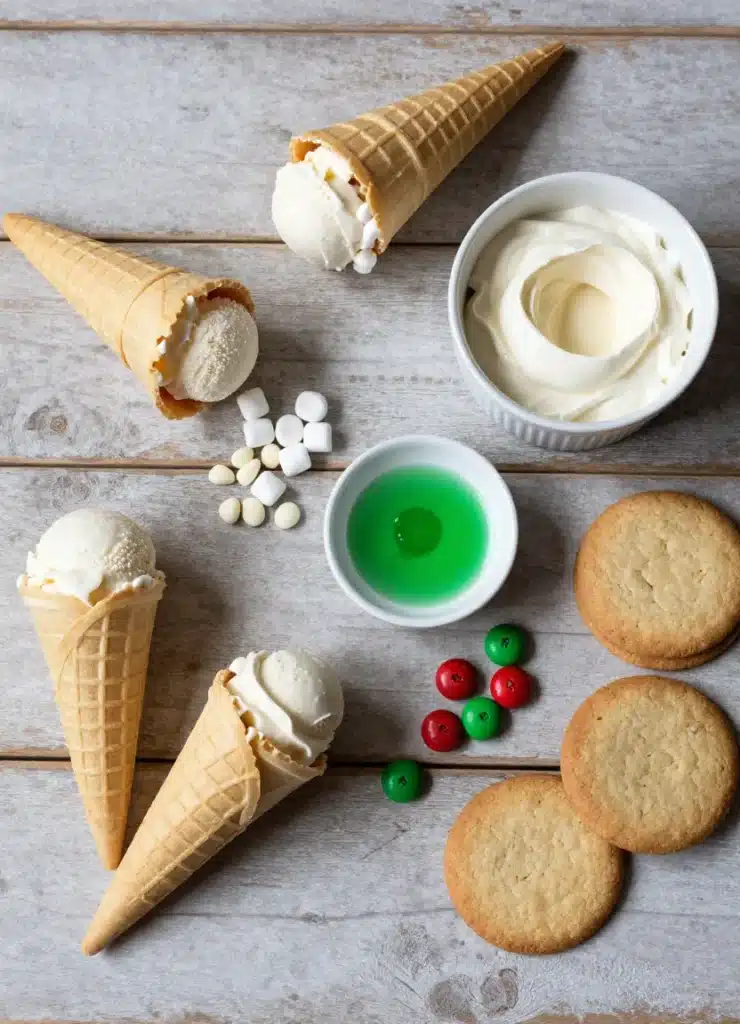
Gathering ingredients for Elf Hats Treats takes just one quick trip to your local grocery store. Here’s everything you need to create these festive delights:
| Ingredient | Amount | Notes |
|---|---|---|
| Sugar ice cream cones | 12 cones | Regular pointed style, not waffle cones |
| Vanilla frosting | 1 cup | Store-bought or homemade |
| Green food coloring | 5-7 drops | Gel works best for vibrant color |
| Mini marshmallows | 12 pieces | For the hat pom-poms |
| White chocolate chips | ½ cup | For the decorative band |
| Red or green M&Ms | 24 pieces | For additional decoration |
| Round cookies | 12 cookies | Sugar cookies or vanilla wafers work perfectly |
Substitutions & Variations
These Elf Hats Treats adapt beautifully to different preferences and dietary needs. For chocolate lovers, substitute chocolate frosting and add red food coloring instead of green. You can also use chocolate cookies as the base for a richer flavor profile.
If you need gluten-free Elf Hats Treats, look for gluten-free sugar cones and cookies. Many brands now offer excellent alternatives that taste just as delicious. For dairy-free versions, use vegan frosting and dairy-free chocolate chips. The results remain just as festive and tasty.
Color variations create fun possibilities too. Try red frosting with white chocolate drizzle for Santa hat versions. Purple and blue make stunning winter wonderland hats. You can even create rainbow Elf Hats Treats using multiple frosting colors.
Instead of M&Ms, consider using small jingle bells (for decoration only, not eating), edible glitter, or crushed candy canes. Sprinkles in holiday colors work wonderfully as well. For the pom-pom, try a Ferrero Rocher chocolate for an elegant twist.
These Elf Hats Treats adapt beautifully to different preferences and dietary needs. For a delicious pairing, consider trying out our Steak and Fries recipe, which offers a savory contrast to these sweet treats.
Step-by-Step Instructions
Creating perfect Elf Hats Treats follows a simple process that anyone can master. Let me walk you through each step with the precision I’ve developed over years of making these with my sisters.
Step 1: Line a baking sheet with parchment paper. This prevents sticking and makes cleanup effortless. Arrange your round cookies on the sheet, spacing them about two inches apart.
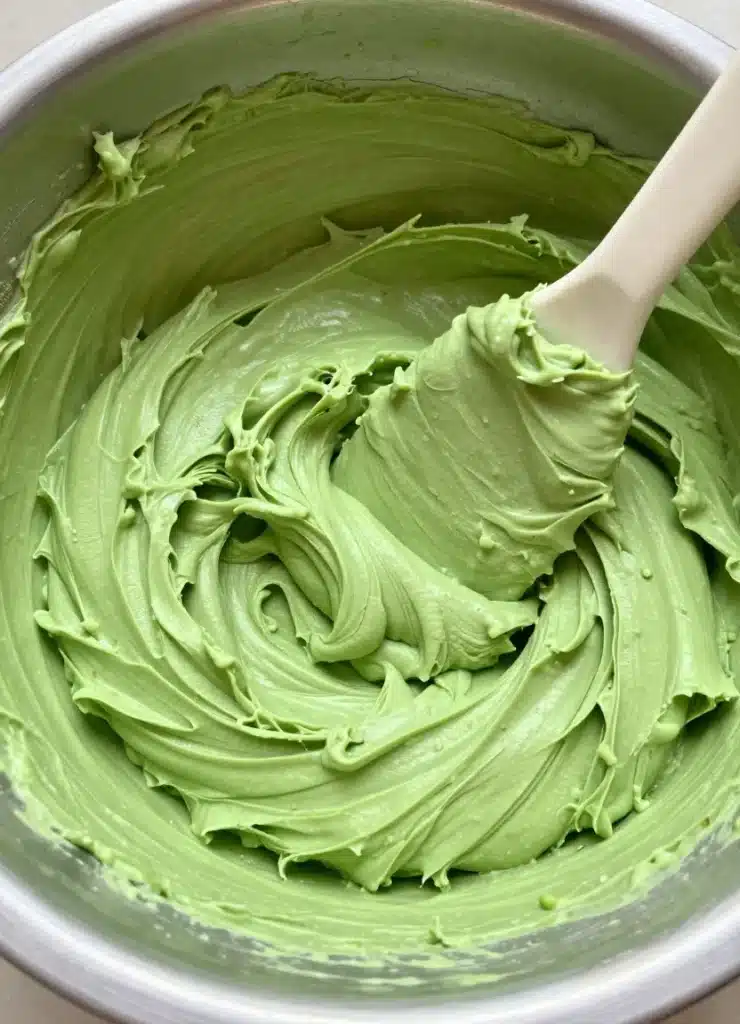
Step 2: Mix your vanilla frosting with green food coloring in a medium bowl. Stir thoroughly until you achieve an even, vibrant green color. The gel food coloring creates the most saturated hue without thinning the frosting.
Step 3: Transfer the green frosting to a piping bag fitted with a medium round tip. If you don’t have a piping bag, a zip-top bag with a corner snipped off works perfectly fine.
Step 4: Pipe a generous circle of green frosting on top of each cookie. This acts as both decoration and adhesive for your cone. Make the circle slightly larger than the cone’s base.
Step 5: Carefully place one sugar cone upside down on each frosted cookie. Press gently to secure it. The cone should stand upright like a little hat.
Step 6: Melt the white chocolate chips in the microwave using 30-second intervals, stirring between each round. Once smooth, transfer to another piping bag or zip-top bag.
Step 7: Pipe a horizontal band of white chocolate around each cone, about one-third up from the base. This creates the hat’s decorative trim.
Step 8: While the white chocolate remains tacky, press M&Ms onto the band for extra decoration. Work quickly before the chocolate sets.
Step 9: Add a small dollop of green frosting to the pointed tip of each cone. Press a mini marshmallow onto the frosting to create the classic pom-pom effect.
Step 10: Refrigerate your Elf Hats Treats for 15-20 minutes to set everything firmly. Then they’re ready to display and enjoy!
Pro Tips for Success
After making countless batches of Elf Hats Treats with Olivia and Mia, I’ve discovered several tricks that guarantee success every time.
First, work in a cool kitchen. If your house feels warm, the frosting and chocolate soften too quickly, making assembly frustrating. I sometimes turn down the thermostat before starting these Elf Hats Treats.
Second, use gel food coloring instead of liquid. The gel type creates more vibrant colors without changing frosting consistency. You’ll get that perfect elf-green shade with just a few drops.
Third, don’t skip the refrigeration step. Those 15 minutes allow everything to set properly, ensuring your Elf Hats Treats hold together beautifully when transported or served.
Fourth, prepare all components before assembly. Having everything ready streamlines the process significantly, especially when working with children who get impatient.
Fifth, consider making extra. These treats disappear remarkably fast at parties. I always prepare at least six more than I think I need.
Finally, handle the sugar cones gently. They break easily, so I always buy a few extra cones as backup. Nothing ruins the fun like running short on supplies.
After making countless batches of Elf Hats Treats with Olivia and Mia, I’ve discovered several tricks that guarantee success every time. For a delightful dessert option to serve alongside, check out our Blackberry Cobbler, which adds a fruity touch to your holiday spread.
Storage & Reheating Tips
Proper storage keeps your Elf Hats Treats fresh and beautiful for several days. Store them in a single layer in an airtight container at room temperature for up to three days. Avoid stacking them, as the weight can damage the delicate cones.
For longer storage, refrigerate these treats for up to five days. However, bring them to room temperature 30 minutes before serving for the best texture and flavor. Cold frosting doesn’t taste as sweet and creamy.
You can freeze unfrosted components separately, but I don’t recommend freezing assembled Elf Hats Treats. The moisture from thawing makes cones soggy and compromises their delightful crunch.
Transport these treats in a rigid container with dividers if possible. The cones are fragile, so protecting them during travel ensures they arrive looking festive and intact.
What to Serve With This Recipe

These Elf Hats Treats shine as part of a larger holiday dessert spread. I love pairing them with hot chocolate bar stations where guests can customize their drinks. The combination of warm chocolate and cold, crunchy treats creates wonderful contrast.
They also complement traditional Christmas cookies beautifully. Arrange your Elf Hats Treats alongside gingerbread men, sugar cookies, and peppermint bark for a stunning holiday cookie platter.
For beverage pairings, consider eggnog, spiced apple cider, or peppermint mochas. The sweet, creamy drinks balance the crunchy texture of these treats perfectly.
At children’s parties, serve these alongside other interactive treats like decorate-your-own cupcakes or Christmas tree fruit platters. Kids love variety and hands-on food experiences.
For adult gatherings, pair Elf Hats Treats with champagne or dessert wines. The playful presentation adds whimsy to elegant holiday parties while still maintaining sophistication.
These Elf Hats Treats shine as part of a larger holiday dessert spread. To complement your festive offerings, consider including Mom’s Coffee Cake, which pairs wonderfully with these whimsical confections.
FAQs
Can I make Elf Hats Treats ahead of time?
Absolutely! You can prepare these Elf Hats Treats up to three days in advance. Store them in an airtight container at room temperature or refrigerate for up to five days.
Just ensure they’re in a single layer to prevent damage. This make-ahead quality makes them perfect for busy holiday schedules.
What’s the best frosting for Elf Hats Treats?
I prefer canned vanilla frosting for convenience and consistency. However, homemade buttercream works beautifully too. The key is using thick frosting that holds its shape.
Avoid whipped or cream cheese frostings as they’re too soft for these structures. Green-tinted vanilla frosting creates the classic elf hat look.
Can kids help make these treats?
Definitely! Elf Hats Treats are perfect for children. They can help color the frosting, press the cones onto cookies, add M&Ms, and attach marshmallow pom-poms.
Just supervise the melted chocolate step. My niece Sophie has been making these since she was five years old with minimal help.
Why do my sugar cones keep breaking?
Sugar cones are delicate and break easily if handled roughly. Always buy extra cones as backup. Store them carefully and handle gently during assembly.
If you find them too fragile, try waffle cones instead, though they’ll look slightly different. Working slowly and carefully prevents most breakage.
Can I use different colors for Elf Hats Treats?
Absolutely! While green is traditional for elf hats, you can use any color combination. Red frosting creates Santa hats, blue makes winter wonderland themes, and multi-colored versions add rainbow fun.
The technique remains identical regardless of color choice. Let your creativity guide you!
Elf Hats Treats are a delightful no-bake dessert that captures the spirit of the holiday season. These whimsical confections, made from sugar cones and frosting, are perfect for festive gatherings and can be customized to suit various tastes and dietary needs, making them a popular choice for holiday celebrations. Learn more about these festive treats in this dessert overview.
Nutrition Information (per serving)
| Nutrient | Amount |
|---|---|
| Calories | 185 |
| Total Fat | 6g |
| Saturated Fat | 3g |
| Cholesterol | 2mg |
| Sodium | 95mg |
| Total Carbohydrates | 32g |
| Dietary Fiber | 0g |
| Sugars | 24g |
| Protein | 1g |
These Elf Hats Treats bring joy, laughter, and delicious sweetness to your holiday celebrations. Whether you’re creating memories with children or impressing guests at festive gatherings, these no-bake wonders deliver every time. Olivia, Mia, and I hope your family enjoys making these as much as we do each December!
Elf Hats Treats
Ingredients
Method
- Line a baking sheet with parchment paper and arrange round cookies.
- Mix vanilla frosting with green food coloring until vibrant.
- Transfer frosting to a piping bag and pipe a circle on each cookie.
- Place a sugar cone upside down on each frosted cookie.
- Melt white chocolate chips and pipe a band around each cone.
- Press M&Ms onto the white chocolate band.
- Add a dollop of frosting to the cone tip and press a mini marshmallow on top.
- Refrigerate for 15-20 minutes to set.
Notes
Or browse by category:
As an Amazon Associate I earn from qualifying purchases.