Baked Garlic Knots
|
Getting your Trinity Audio player ready...
|
Growing up in a bustling kitchen alongside my sisters, Olivia and Mia, I quickly learned that food serves as the ultimate love language. At Delichious.com, we believe that the best meals come from simple, seasonal ingredients prepared with care. There is something truly magical about the aroma of yeast and garlic filling a home.
This specific recipe for Baked Garlic Knots holds a very special place in my heart. I remember the first time I prepared these for a chilly autumn dinner party. Olivia was busy simmering a rich Bolognese sauce while Mia assembled a crisp, seasonal pear salad.
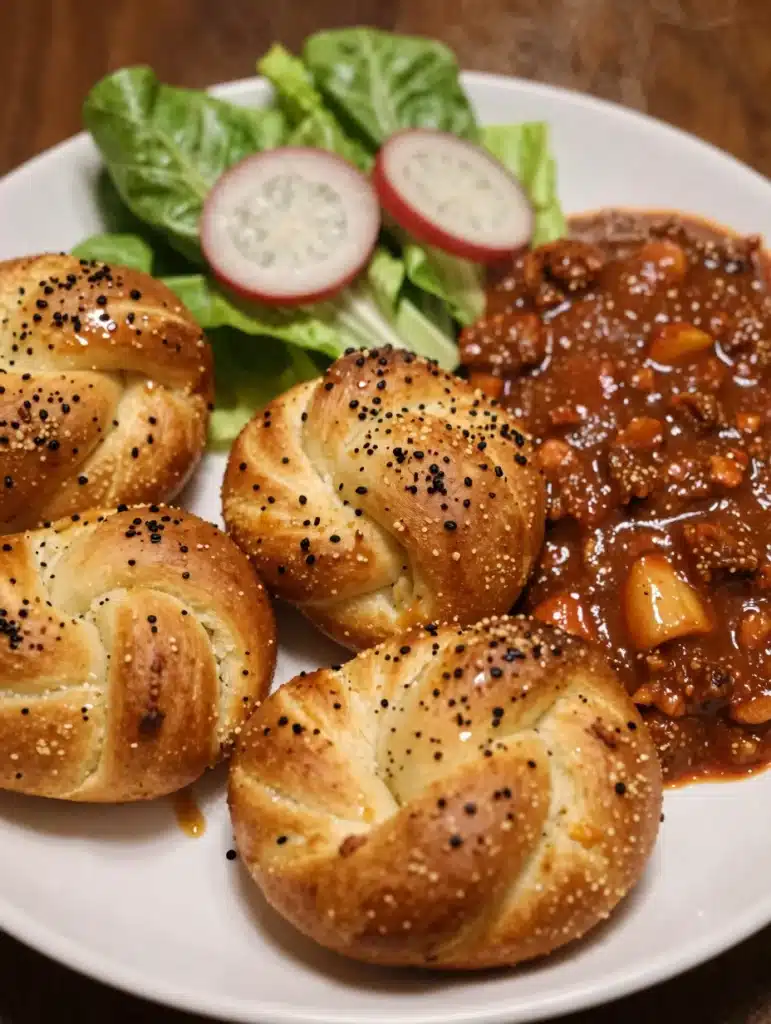
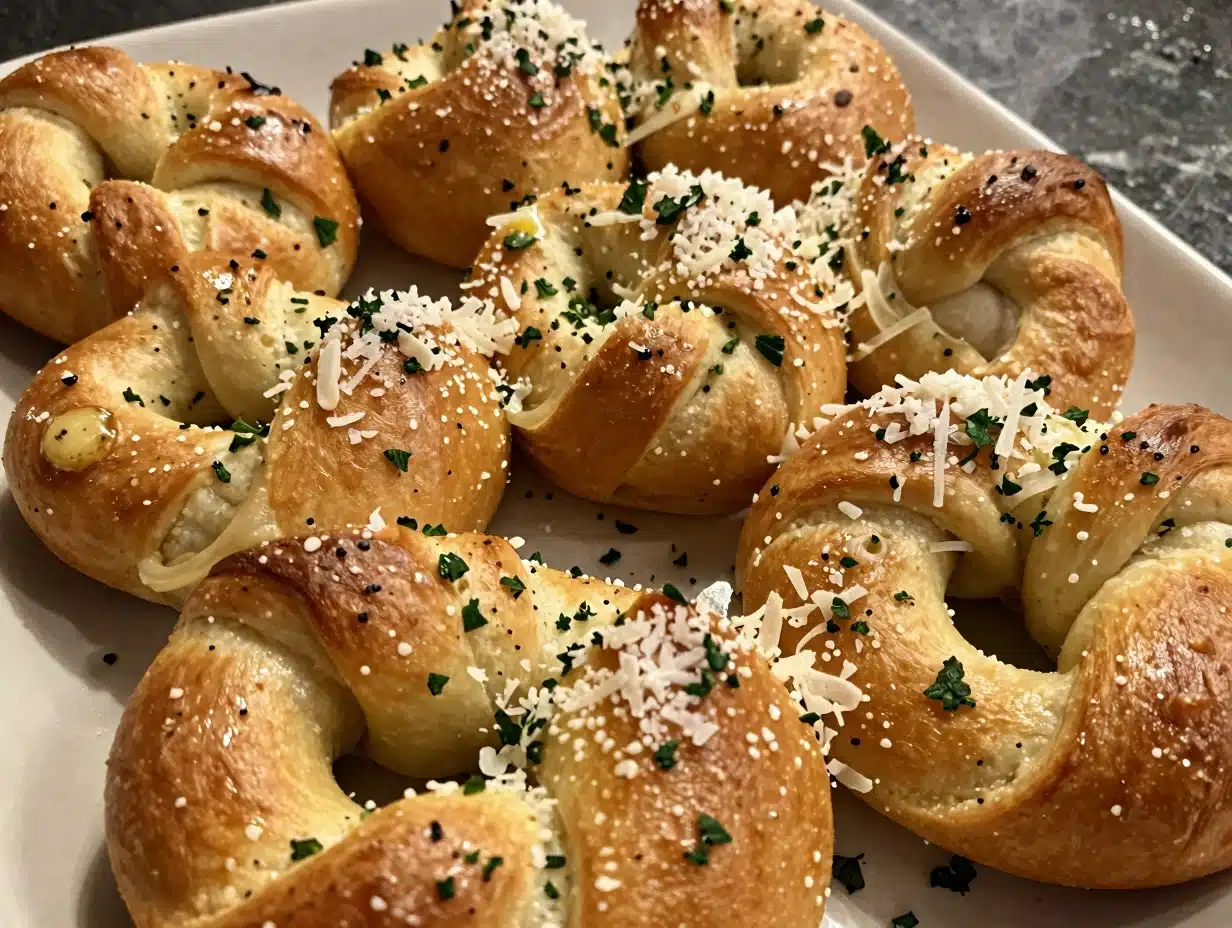
I wanted to create a bread side that felt both elegant and comforting. When I pulled the first tray of Baked Garlic Knots out of the oven, the kitchen transformed. The golden brown crust and the scent of fresh parsley immediately drew everyone in.
These Baked Garlic Knots are not just a side dish. They are a conversation starter and a warm hug in edible form. As a professional chef, I focus on precision, but I also prioritize the joy that home cooks feel when they master a classic.
These Baked Garlic Knots offer the perfect balance of a soft, pillowy interior and a savory, buttery exterior. Every time I bake a batch, I feel that same connection to my sisters and our shared passion for nourishing food. I invite you to bring that same warmth into your own kitchen with this reliable and delicious recipe.
Why You Will Love These Baked Garlic Knots
You will absolutely adore these Baked Garlic Knots because they offer a restaurant quality experience right in your own kitchen. Many people feel intimidated by yeast dough, but this recipe simplifies the process for every skill level. Firstly, the texture of these Baked Garlic Knots is unparalleled.
We use a high quality bread flour to ensure a chewy, satisfying bite that stands up to the rich garlic butter. Secondly, the flavor profile is incredibly bold. We do not shy away from fresh garlic, which provides a pungent and sweet kick once roasted in the oven.
Furthermore, these Baked Garlic Knots are incredibly versatile. You can serve them alongside a formal Italian dinner or enjoy them as a casual snack during a weekend game night. Additionally, making Baked Garlic Knots from scratch allows you to control the ingredients.
You can avoid the preservatives found in store bought versions and focus on fresh, wholesome components. My sisters and I always prioritize nourishment, and these knots provide comfort without unnecessary additives. Finally, the process of tying the dough into knots is surprisingly therapeutic.
It allows you to slow down and appreciate the tactile nature of cooking. Once you see the golden shimmer on your finished Baked Garlic Knots, you will feel a genuine sense of pride.
Ingredients You Will Need
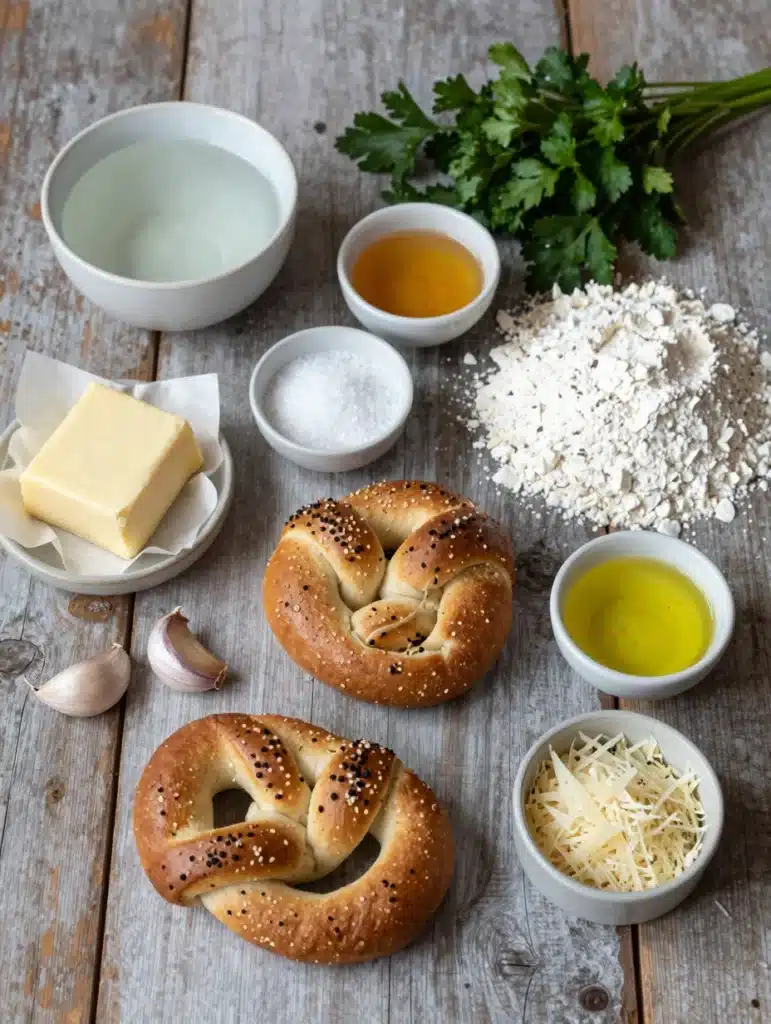
To create the perfect Baked Garlic Knots, you need fresh, high quality ingredients. We recommend using fresh yeast whenever possible, though active dry yeast works beautifully too. For the flour, bread flour yields the best results because of its higher protein content.
However, all purpose flour serves as a fine substitute if that is what you have in your pantry. The garlic must be fresh. Avoid the pre-minced jars, as they lack the vibrant oils necessary for a truly aromatic topping. High quality European style butter also makes a significant difference in the final flavor of your Baked Garlic Knots.
| Ingredient | Amount | Purpose |
|---|---|---|
| Warm Water (110°F) | 1.5 Cups | Activates the yeast |
| Honey or Sugar | 1 Tablespoon | Feeds the yeast and adds subtle sweetness |
| Active Dry Yeast | 2.25 Teaspoons | Provides the rise and airy texture |
| Bread Flour | 4 Cups | Creates the structure and chew |
| Sea Salt | 2 Teaspoons | Enhances the overall flavor |
| Extra Virgin Olive Oil | 3 Tablespoons | Softens the dough crumb |
| Unsalted Butter | 1/2 Cup | Creates a rich, savory coating |
| Fresh Garlic (minced) | 6 Cloves | The star flavor component |
| Fresh Italian Parsley | 1/4 Cup | Adds freshness and color |
| Grated Parmesan Cheese | 1/4 Cup | Adds a salty, umami finish |
Substitutions & Variations
While I believe this recipe for Baked Garlic Knots is perfect as written, I understand that home cooks often need to adapt based on what they have. If you follow a vegan lifestyle, you can easily modify these Baked Garlic Knots. Simply replace the butter with a high quality plant based butter or more extra virgin olive oil.
You can also omit the Parmesan cheese or use a nutritional yeast blend for that salty kick. For those who enjoy a bit of heat, consider adding a half teaspoon of red pepper flakes to the garlic butter mixture. This adds a delightful glow to the Baked Garlic Knots.
If you are short on time, you can technically use store bought pizza dough. However, I highly encourage you to try the homemade dough at least once. The texture of homemade Baked Garlic Knots is significantly more tender.
You can also experiment with different herbs. While parsley is traditional, fresh rosemary or thyme can offer a more earthy, seasonal flavor profile. If you want a more decadent version, tuck a small cube of mozzarella cheese into the center of each knot before baking. This creates “stuffed” Baked Garlic Knots that kids and adults alike will find irresistible.
While I believe this recipe for Baked Garlic Knots is perfect as written, I understand that home cooks often need to adapt based on what they have. If you’re looking for a delightful twist, try pairing them with Baked Brie with Honey and Walnuts for a rich and creamy contrast.
Step-by-Step Instructions
Creating Baked Garlic Knots requires a bit of patience, but the process is very straightforward. Follow these steps carefully to ensure your Baked Garlic Knots turn out perfectly every single time.
Step 1: Bloom the Yeast. In a large bowl or the bowl of a stand mixer, combine the warm water, honey, and yeast. Stir gently and let it sit for about five to ten minutes.
You should see a foamy layer form on the surface. This indicates that the yeast is alive and ready to work. If it does not foam, your water might have been too hot, or the yeast might be expired. Always check this before moving forward with your Baked Garlic Knots.
Step 2: Mix the Dough. Add the olive oil and salt to the yeast mixture. Gradually add the bread flour, one cup at a time.
If you use a stand mixer, use the dough hook attachment on low speed. Continue mixing until the dough pulls away from the sides of the bowl. The dough for your Baked Garlic Knots should feel soft and slightly tacky, but it should not stick to your fingers excessively.
Step 3: Knead the Dough. Turn the dough out onto a lightly floured surface. Knead the dough by hand for about 8 minutes.
This process develops the gluten, which gives the Baked Garlic Knots their iconic chew. If you use a mixer, continue kneading on medium-low speed for 5 to 6 minutes. The dough should become smooth and elastic.
Step 4: The First Rise. Lightly oil a large bowl and place the dough inside. Cover it with a clean kitchen towel or plastic wrap.
Place the bowl in a warm, draft-free spot. Let the dough rise until it doubles in size. This usually takes about 60 to 90 minutes. This rise is crucial for the light texture of your Baked Garlic Knots.
Step 5: Shape the Knots. Punch the dough down to release the air. Divide the dough into 20 to 24 equal pieces.
Roll each piece into a rope about 6 inches long. Tie the rope into a simple knot, tucking the ends underneath. Place the shaped Baked Garlic Knots onto a parchment-lined baking sheet. Space them about 2 inches apart.
Step 6: The Second Rise. Cover the shaped Baked Garlic Knots and let them rise again for another 30 minutes. Meanwhile, preheat your oven to 375°F (190°C). This second rise ensures the knots stay airy and do not become dense during the baking process.
Step 7: Bake. Place the tray in the oven and bake for 15 to 18 minutes. The Baked Garlic Knots should turn a beautiful golden brown color. While they bake, prepare your garlic butter topping.
Step 8: The Finishing Touch. Melt the butter in a small saucepan over low heat. Add the minced garlic and cook for just one minute.
You want the garlic to soften and infuse the butter without browning or becoming bitter. Remove from heat and stir in the fresh parsley. As soon as the Baked Garlic Knots come out of the oven, brush them generously with the garlic butter. Sprinkle the Parmesan cheese over the top while they are still hot so it adheres perfectly.
Pro Tips for Success
As a chef, I have learned a few tricks to elevate simple recipes into something extraordinary. When making Baked Garlic Knots, the temperature of your water is paramount. Use a thermometer to ensure it stays between 105°F and 115°F.
Water that is too hot will kill the yeast, while water that is too cold will not activate it properly. Furthermore, do not rush the rising process. Yeast works on its own schedule.
If your kitchen is cold, your Baked Garlic Knots might take longer to double in size. You can place the dough in an unlit oven with the light turned on to create a warm environment. Another tip involves the garlic.
I prefer to mince the garlic very finely or even grate it using a microplane. This ensures that every bite of your Baked Garlic Knots has an even distribution of flavor. Additionally, always use fresh herbs.
Dried parsley does not provide the same vibrant green color or the grassy freshness that defines a great garlic knot. Finally, do not over-bake the bread. Keep a close eye on the oven during the last few minutes.
You want a light golden hue. If you bake them too long, the Baked Garlic Knots will lose their signature softness and become crusty.

As a chef, I have learned a few tricks to elevate simple recipes into something extraordinary. For a complete meal, consider serving your Baked Garlic Knots alongside Baked Chicken Parmesan for a delicious Italian feast.
Storage & Reheating Tips
If you happen to have leftovers, you can store your Baked Garlic Knots quite easily. Place them in an airtight container or a zip-top bag once they have cooled completely. They will stay fresh at room temperature for up to two days.
For longer storage, you can keep them in the refrigerator for up to five days. However, I highly recommend freezing any Baked Garlic Knots you do not plan to eat within 48 hours. They freeze beautifully for up to three months.
To freeze, place the knots in a single layer on a baking sheet until frozen solid, then transfer them to a freezer-safe bag. When you are ready to enjoy them again, reheating is key to reviving that fresh-baked texture. Avoid the microwave if possible, as it can make the dough rubbery.
Instead, wrap the Baked Garlic Knots in aluminum foil and warm them in a 350°F oven for about 10 minutes. This gently heats them through while maintaining their softness. If they feel a little dry, you can brush on a small amount of fresh melted butter after reheating to restore their luster.
What to Serve With This Recipe
These Baked Garlic Knots serve as the perfect companion to a wide variety of dishes. Naturally, they pair perfectly with Italian classics. Serve them alongside a big bowl of spaghetti carbonara or a hearty lasagna.
They are also excellent for dipping into a bowl of homemade marinara sauce or a creamy Alfredo. Beyond pasta, I love serving these Baked Garlic Knots with a large seasonal salad. The contrast between the warm, buttery bread and crisp, cold greens is delightful.
During the colder months, Olivia often pairs these Baked Garlic Knots with her famous roasted tomato basil soup. They act as the perfect vessel for soaking up every last drop of broth. If you are hosting a summer barbecue, these knots also work well with grilled chicken or steak.
The garlic flavor complements charred meats beautifully. Essentially, any meal that would benefit from a side of bread is a candidate for these Baked Garlic Knots. They bring a touch of elegance and a lot of flavor to any table setting.
These Baked Garlic Knots serve as the perfect companion to a wide variety of dishes. For a hearty meal, enjoy them with Crockpot Baked Ziti for a comforting and satisfying dinner.
FAQs
Can I use store-bought pizza dough for Baked Garlic Knots?
Yes, you can certainly use store-bought pizza dough as a time-saving shortcut. However, the texture and flavor will differ slightly from the homemade version. If you choose this route, let the dough come to room temperature before shaping it into Baked Garlic Knots.
This makes the dough more pliable and easier to tie. Follow the same baking instructions, but keep a close eye on the oven, as store-bought dough sometimes browns faster.
How do I make my Baked Garlic Knots stay soft?
The key to soft Baked Garlic Knots lies in the fat content and the baking time. Adding olive oil to the dough helps keep the crumb tender. Additionally, brushing the knots with butter immediately after they exit the oven creates a moisture seal.
This keeps the interior soft while the exterior remains flavorful. Ensure you do not over-measure your flour, as too much flour leads to a dry, tough knot.
Can I freeze Baked Garlic Knots before baking?
Absolutely. You can prepare the recipe through the shaping step. Once you have tied the Baked Garlic Knots, place the tray in the freezer until the knots are firm.
Transfer them to a freezer-safe bag. When you are ready to bake, let them thaw and rise in a warm spot for about 2 to 3 hours before putting them in the oven. This allows the yeast to reactivate and gives you fresh Baked Garlic Knots on demand.
What is the best way to reheat Baked Garlic Knots?
The best way to reheat Baked Garlic Knots is in the oven. Wrap them in foil to prevent the exterior from drying out and bake at 350°F for about 10 minutes. This method preserves the pillowy texture. If you are in a rush, a microwave works for 15 seconds, but the oven provides a much better result for these Baked Garlic Knots.
How do I prevent the garlic from burning on my Baked Garlic Knots?
To prevent the garlic from burning and becoming bitter, I do not bake the garlic on the knots. Instead, I infuse the garlic into melted butter on the stovetop while the bread bakes. By brushing the garlic butter onto the Baked Garlic Knots after they leave the oven, you ensure the garlic remains sweet and aromatic without any burnt flavor.
Baked Garlic Knots are a popular appetizer or side dish made from dough that is tied into knots and baked until golden. These delightful treats are often served with garlic butter and herbs, making them a flavorful addition to any meal, as detailed in this bread overview.
Nutrition Information (per serving)
The following nutritional values are estimates based on a single serving size of one knot. This recipe makes approximately 24 Baked Garlic Knots. We focus on using real, whole ingredients to provide a satisfying and nourishing addition to your meal.
| Nutrient | Amount Per Serving |
|---|---|
| Calories | 165 kcal |
| Total Fat | 7g |
| Saturated Fat | 3g |
| Cholesterol | 12mg |
| Sodium | 210mg |
| Total Carbohydrates | 22g |
| Dietary Fiber | 1g |
| Sugars | 1g |
| Protein | 4g |
Baked Garlic Knots
Ingredients
Method
- Step 1: Bloom the Yeast. In a large bowl, combine warm water, honey, and yeast. Let it sit for 5-10 minutes until foamy.
- Step 2: Mix the Dough. Add olive oil and salt to the yeast mixture. Gradually add bread flour until the dough pulls away from the sides.
- Step 3: Knead the Dough. Knead by hand for 8 minutes or with a mixer for 5-6 minutes until smooth and elastic.
- Step 4: The First Rise. Place the dough in an oiled bowl, cover, and let it rise until doubled in size (60-90 minutes).
- Step 5: Shape the Knots. Punch down the dough, divide into 20-24 pieces, roll into ropes, and tie into knots.
- Step 6: The Second Rise. Let the shaped knots rise for another 30 minutes while preheating the oven to 375°F.
- Step 7: Bake. Bake for 15-18 minutes until golden brown.
- Step 8: The Finishing Touch. Melt butter, add minced garlic, and brush over the knots. Sprinkle with Parmesan.
Notes
Or browse by category:
As an Amazon Associate I earn from qualifying purchases.